How to List Products
Step 2
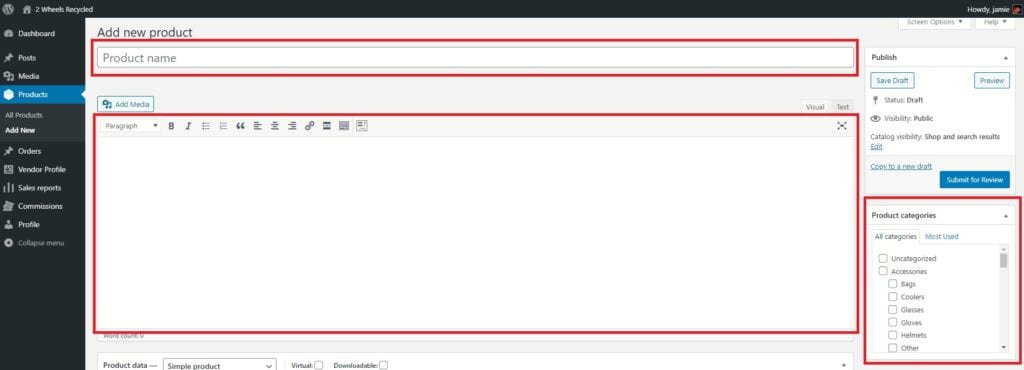
Before you begin selling your product, you will need to enter product information. Start out by adding the “product name” at the top (required). Product Name will show up at the top of the product page. In the “paragraph” below product name, enter optional detail information as necessary. E.g. – product description, size, dimensions, product condition, etc. The product detail will appear under the product pictures. Next, go to the product category box on the right and select the appropriate categories your product belongs in.
Step 3
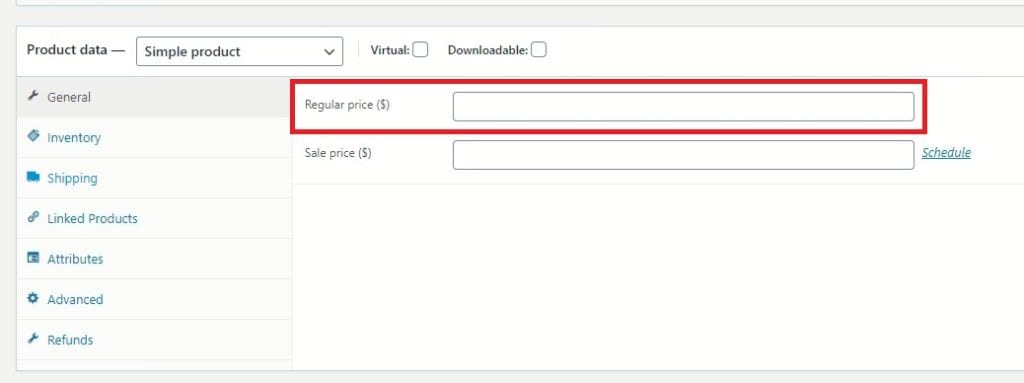
When you scroll down, you will see the Product Data box where you can add more product details. In the general tab, add the price of your product. The inventory tab is defaulted to 1, but can be changed appropriatley if needed. Next, click the shipping tab and check the box below to “enable per-product shipping”. To enter your flat shipping cost, click the Insert Row button, and fill in the country code and item cost box with the appropriate information. Item cost will apply the shipping amount you input per item. If desired, you can choose line cost and input your shipping amount which applies at the order level.
Optional – “Product Short Description” is under the Product Data box. The Product short description text appears under the “Product Name” Heading on the product page. Though this is optional, I repeat the product name and include garment size or some type of brief detail about the product.
Step 4
On the bottom right, you will see the product image box. Click the “Set Product Image” link to upload a picture of your product. If your product has additional images, click the “Add product gallery images” and upload and add each picture/image. To note, each picture/image will appear in the right side box for your approval. When you are ready to publish your product, scroll back to the top of the page and click the “Submit for Review” button on the top right. We will then review it and notify you when your product has been approved or denied to be sold.


